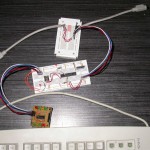
I had been working toward my degree in Computer Science at Trent University @ Durham, for quite some time, and was anxious to wrap up my last few credits this September past. I enrolled in COIS 2750H: Computer crime and forensics, and with a description including “…including Internet scams, phishing, pharming, identity theft…” I needed to inject something that I would find new and interesting, dealing with most of this other stuff every day.
This was the first hardware project that I designed to do something with real world applications, besides talking to some I2C devices, and blinking some LEDs. It really helped me to demonstrate to my classmates that their assumptions about the machines that they use everyday may not reflect reality.
This project is released under the BSD license, which happens to also state that I am not liable for anything that you might think this project is useful for, or any harm you may cause by it. You are responsible for your actions.
I think this is a great starter project for someone getting in to microcontrollers. You have to deal with an externally controlled bus, and also need to use some kind of digital storage. If you are interested in implementing something like this from scratch, check out my references section.
Hardware Details
The hardware that was used for this project was chosen mainly because that’s what I had around the shop. The following ICs were used:
- Microchip 16F883 PIC Micro-controller
- Microchip 24AA08 8kbit serial EEPROM

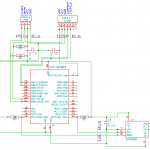
There are a few different buses to connect to. I left the In-Circuit Serial Programming (ICSP) bus in the diagram so that people just trying out the project for the first time might have some luck. I should note that the pin header is wired for a QuickWriter MCU Programmer. The power for the whole circuit comes from the PS/2 bus itself, and we’ll also need to interface to I2C devices. On my actual prototype implementation, I also use a I2C LED bank to write debugging information to.
Software Details
To use the I2C bus, I needed to make some modifications to BoostC’s i2c_driver.h. You should make them too, as of writing the patch has not made it into the distribution, and I’m unsure of their policy about redistributing their code (as my patched version). This patch allows for more efficient writing to I2C EEPROMs as described in Microchip app note AN1028.
Download
Current version: keylogger-1.0 April 16, 2009 7-Zip
What’s next?
As with any tech project, there is a lot of room for improvement. Here’s a short list of ideas that I have floating around, and may implement some day:
- Improve spin loops to verify state change timing (specifically checking the clock being held low).
- Improve handling of when to hold the clock low (like when writing to storage).
- Improve handling of the host holding the clock low.
- Find a way to abstract the pins used on the chip away from the PS/2 API without resorting to the hackish “templates” used in BoostC. Currently the API only allows one PS/2 bus.
- Move storage off of I2C EEPROM onto SPI MicroSD
I’m planning to implement the MicroSD, and also taking control of the bus when writing to it, but I need some more parts. PS/2 is 5v, while MicroSD is 3.3v so I’ll need to turn down the voltage first.
Resources
Keylogger Presentation given to the class.
Software used in project
PIC C Compiler (Hobbyist Version – free)
Sourceboot BoostC v6.90
http://www.sourceboost.com/
Schematic Design Software (GPL’d) (that finally worked!)
KiCad 20080825c-final
http://www.lis.inpg.fr/realise_au_lis/kicad/
Dia (State Diagram)
Dia 0.96.1-8
http://dia-installer.de/index_en.html
References
Interfacing with PS/2
The PS/2 Mouse/Keyboard Protocol
The PS/2 Keyboard Interface
Interfacing the AT keyboard
I used the clock image from here for the presentation, also relied most heavily on this source
Timing Diagrams
I had no idea what it was called at the time, but the diagram that shows you the tolerances of when stuff is supposed to happen is called a timing diagram. Until I found it, the timing was a source of frustration for me. I was using conflicting information: 15-32khz clock, 50khz clock, etc.
PS/2 Keyboard & Mouse Protocols Auxiliary Device and System Timings
Solid-State Optical Mouse Sensor with PS/2 and Quadrature Outputs – Also contains detailed timing diagrams